Lipstick can make you or break you. It can make you look beautiful, young, and vibrant. But if you use the wrong lipstick, it can make you look overdone and pale. Here is a guide to the different types of lipsticks so you can better understand their uses. Before using any kind of lipstick, make sure to line your lips with a lip liner (try matching it closely to the lipstick shade that you are using). For a better application, apply your lipstick with a lip brush, this gives you more control.All About Lipstick
Lipstick can make you or break you. It can make you look beautiful, young, and vibrant. But if you use the wrong lipstick, it can make you look overdone and pale. Here is a guide to the different types of lipsticks so you can better understand their uses. Before using any kind of lipstick, make sure to line your lips with a lip liner (try matching it closely to the lipstick shade that you are using). For a better application, apply your lipstick with a lip brush, this gives you more control.All About Face Powders
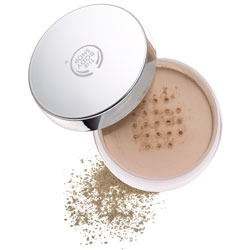
Loose Powder
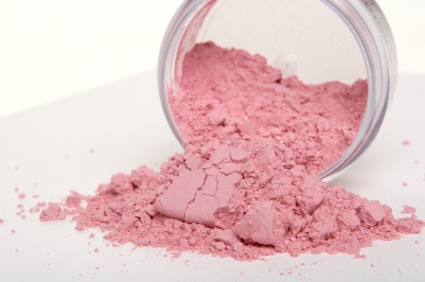
Loose Powder is the mother of all powders. It gives you a perfectly polished look. You can apply it with a big powder brush. Make sure to get a powder that matches your skin tone perfectly.

Pressed Powder
Pressed powders are portable and convenient. Translucent formulas are the best. They even out your skin tone and control shine while letting your natural complexion shine through.
All About Face Powders
Lips and Lipstick Tips for You 3
Lips and Lipstick Tips for You 2
Easy Lip Tips
Lips and Lipstick Tips for You 2
Lips and Lipstick Tips for You 1
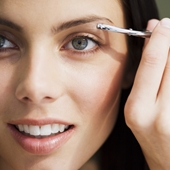
Read Before Tweezing Your Eyebrows..
What Eyebrow Teezers should I use ?Read Before Tweezing Your Eyebrows..
Learn All about Waxing Your Eyebrows...
Waxing is a quick and relatively easy alternative to plucking your eyebrows. Most beauty experts recommend getting your eyebrows waxed professionally but that can be expensive - up to around $10-$15 dollars depending on the salon. If you are confident and then here are some tips for waxing your eyebrows yourself. Start by prepping the eyebrow
Brush the brush into place with toothbrush or clean mascara wand, so that their natural shape is neatly defined. Next, apply an astringent such as witch hazel to anesthetize the skin under the brow. Discover your natural brow shape by standing several feet away from a mirror, and following these simple steps The length of the eyebrow
Hold a ruler parallel to your nose, and level with the inner corner of the eye, to work out where the brow should begin. If your eyes are close together, make the gap between the brows wider. If your eyes are far apart, don't wax the start line of the brow too much so that they are closer together. Mark the correct point with a dot.The curve of the eyebrow
You can assess where the highest point of the curve/ arch should be by holding a ruler from the edge of the nostril past the outer edge of the iris (the colored part of the eye) and up to the eyebrow. Mark the spot with a dot.Now line up the dots in a gentle arch to draw on the ideal shape of the eyebrow that you want to achieve. This will give you a guideline to go by when applying the wax. You should aim for a smooth arched brow that tapers slightly at the outer ends.
What to consider when applying the wax
I recommend that you buy a professional waxing kit - basically a jar or tub of wax which can be warmed up in boiling water and applied with a small applicator or spatula, and (usually muslin) removal strips. Each product varies slightly, so be sure to read the manufacturers directions carefullyWarm up the wax to optimum temperature and use the small spatula to apply a thin layer of wax to the growth. Make sure that you only use a small amount of wax on the spatula to avoid the wax dripping when it is applied. Apply wax with the hair growth under the eyebrow, (i.e. in the same direction that the hair grows in). Be careful a little goes a long way and make sure to avoid letting the wax dry
The hair removal process
Never wax above the eyebrow, only shape from below. Waxing from under the brow will widen your eyes and help to get the line even. This will make you look younger and much more glamorous if done correctly! As soon as it is applied remove the wax against the hair growth, (i.e. in the opposite direction that the hair grows in). This is done by gently smoothing a piece of cotton muslin over the waxed area, pulling the skin taut with one hand, and pulling the muslin off with the other.It is a good idea to take a little hair off at a time, especially if you have fairly this growth. You will be surprised how much difference a little hair removal will make to your appearance.
The final step 
Any straggly hairs left over after waxing can be easily plucked out using a set of good tweezers. Apply a soothing balm like tea tree oil onto the area afterwards. You should avoid direct sunlight, acid based facial treatments, and liquid makeup for several hours. To give the gorgeous new eyebrow shape emphasis, use an eyebrow pencil or tinted brow shadow to subtly fill in any gaps, and even out the natural color tone. Congratulations you have successfully waxed your own eyebrows!
Learn All about Waxing Your Eyebrows...
Want to get Soft Kissable Lips !!!!
Soft, kissable lips are sooo easy to get, but a lot of us forget to pamper our pucker, especially in the summer. The cold winter months have us all applying and reapplying our chapsticks, but what about summer? The sun can do a lot of damage to your lips and you may not even notice. Here are 3 steps to get super soft lips and having them all year long.
Step 1:
You exfoliate your arms and legs, but do you do the same for your lips? Use a soft, gentle exfoliant and rub it into your lips in slow, circular motions. This will not only remove dead skin cells, but the circular motion will also get the blood flowing giving your lips a nice rosy tint.
Step 2:
After you’ve exfoliated, use a good quality lip balm with an SPF. We prefer Burt’s Bees lip balms because they are all natural and do a really good job of leaving your lips soft and also protecting them from getting burnt.
Step 3:
Lastly, apply a moisturizing lipstick. I like to use shades that are close to my actually lip shade to get a natural look. For super soft lips, make sure you always apply lip balm before putting on lipstick or gloss – just make sure you wait a couple of minutes so it dries.
Want to get Soft Kissable Lips !!!!
Getting Gorgeous Eyebrows
Going to get your eyebrows done on a regular basis can empty out your wallet pretty fast, but if you know how to do them right, why spend a fortune and get them done by someone else? Here’s how you can do your own eyebrows in just a few simple steps. No money, no fuss, no pain!
Step 1
Start by brushing your brows upwards using a brow brush. Then snip off the long ends of any hairs that might stick out using a pair of brow scissors and continue brushing downwards. Doing this will ensure that you trim off the bulk of the hair, plus will reveal your natural brow shape.
Step 2
Hold a pencil parallel to the side of the bridge of your nose: that’s where the inner edge of your brow should start. To determine the highest point of your arch, place the pencil parallel to the outside corner of your iris. To find out where your brows should end, just hold the pencil diagonally from your nostril to the outside corner of your eye. You can also just look in the mirror and find the highest point of your brow. From there, you can tweeze right underneath the high point to maximize the arch.
Step 3
Using a brow pencil, mark the spots you just found and begin tweezing accordingly. Be sure to remove no more than 2 rows of hair so your brows still maintain a natural shape and look. You may need to remove just a few hairs from the top of the brows to make them look neat and shaped.
Getting Gorgeous Eyebrows
Summer Beauty Fixes
During the summer months, there is no worse enemy than heat and humidity. You know those hot, sticky days where everything melts and your hair looks like it’s been soaked in water even though you just left the house looking all fresh and perfect? Well I do, and I say there has to be a solution for that! Read on to find out how you can prevent sticky hair and melting makeup.
PREVENT STICKY HAIR IN THE SUMMER
Your hair goes limp in the hot summer months, so avoid this by including a little something extra in your hair routine. Use an aerosol spray on your roots before heading out the door. This will ensure your hair holds up and give it a little volume. You can also use hair powder so you soak up any excess moisture. Another trick you can use is to dab your neck with toner so you eliminate the oil and moisture that builds up around the area. For frizzy hair, make sure you always use a hair serum or any anti-frizz product; they DO work!
MELTING MAKEUP
We all this problem: you put your makeup on in the morning, but by the afternoon, it’s all gone. It’s like a magic trick! Have an oil blotter at your fingertips to absorb the sweat, without ruining your makeup. Use makeup primer instead of lotion on your face, as this will absorb any oil and make sure to add a little extra on trouble spots such as your nose, chin and forehead. Always apply a powder after you put on your foundation. This will ensure that your makeup stays on a little longer all the while sucking up the excess oil. And of course the number one rule is to go easy on the products; keep it light and simple and you should have no problems!
Summer Beauty Fixes
Summer Look
With the unbearable heatwave still on, it can be a little hard to get your makeup to stay on, but if you wear a natural look you’ll be guaranteed that there will be no meltdowns! Keep your face fresh and simple this summer and you’ll have no mishaps! Here’s how to get a fresh, natural, no-makeup look in 3 easy steps!
Step 1
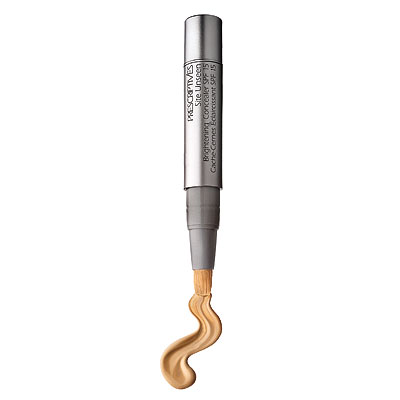
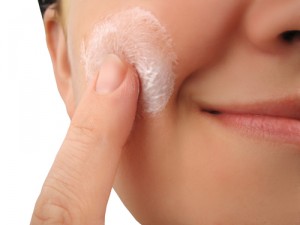
Moisturize! Before putting anything on your face, rub in a light moisturizer to prevent flaking and to help your makeup stay on better! If you have any imperfections, use a concealer only where needed and gently pat it on (no rubbing it in!) until it is blended into your skin. Also, apply a small amount of concealer to your lids. This will brighten them up and make your eyes appear bigger, and less tired. Follow up with a light, translucent powder all over your face.
Step 2
Take a soft, pinkish blush and swipe it across the apples of your cheeks. This will just give your cheeks a rosy tint, but nothing too dramatic. You want to look fresh and natural, so go easy on the blush!
Step 3
Finish off the bare look with one coat of mascara, nude beige lipstick and a swipe of clear gloss. This look is definitely simple and natural, but it’s great for any day of the week because it’s super quick and won’t sweat off your face.
Summer Look
How to Wear Makeup to the Beach
With the summer finally in full swing, you’ll probably be hitting up a few beaches and pool parties, but how exactly should you proceed with your makeup? Everyone knows that wearing a full face of makeup in the heat (especially if you’re outside all day) or while swimming is a big no no. But thankfully, there are lots of other ways you can look flawless in the sun without pilling on the heavy makeup.
USE AN SPF
Start With Sunscreen – Apply a quarter-size drop of SPF to your face and neck. Massage slowly into your skin and let dry for about 5 minutes until you do anything else. Next, take a blotting sheet and apply to oily areas like your T-zone to ensure that all excess residue is soaked up.
COVER UP IMPERFECTIONS
Pick up an SPF spiked face powder – not only will it save your skin from the sun but it will also give you coverage and keep your skin staying matte instead of oily. Just dust the powder all over your face and neck to ensure even coverage.
WATERPROOF YOUR MASCARA
Swipe your lashes with a waterproof mascara. Only give it one or two coats thought – you don’t want them looking thick and heavy.
PROTECT YOUR POUT
Lastly, use an SPF lip balm to protect your lips from the harmful rays and also give you a soft, kissable pout.
How to Wear Makeup to the Beach
An Easy Summer Makeup Look
Step 1: Prep
Prep your skin by starting off with a clean face. Apply a light, oil-free moisturizer and massage it in circular motions. Once the moisturizer has completely melted into the skin, apply a good primer which will ensure your concealer/foundation will stay put. You should also prep your eyes by applying an eye primer onto your lids.
Step 2: Flawless Finish
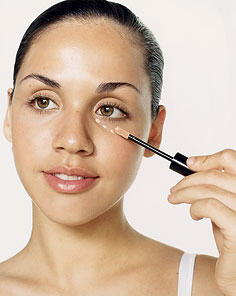
If you have perfect skin, just use a good tinted moisturizer to get a perfect, flawless finish. If you’re not that lucky though, start off by dotting on concealer wherever needed (red spots, blemishes, and dark circles). Pat the concealer in, making sure the problem area is thoroughly concealed. When it’s hot out, I prefer to skip the foundation as it can be a little too heavy. Instead, I just apply a matte powder all over my face. This will even out discoloration and put the concealer in its place.
Step 3: Beautify
This is where the color comes in. Get a big powder blush and swirl it over your favorite bronzer. Remember, start with little at first as you can always add more later (it’s harder to remove!). First, run the brush along the contour of your face. Then, run the brush over your brow bone, down to the apples of your cheeks, and just right underneath your chin, like a figure 3. Once you’ve achieved your perfect level of bronzing, add a little blush. Pick a peachy pink color that will look natural on you. Using a kabuki brush, just dab the apples your cheeks and blend it in.
Step 4: The Eyes
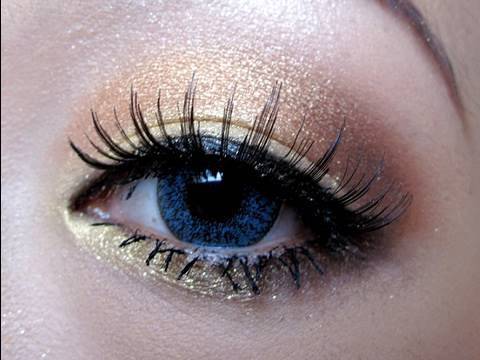
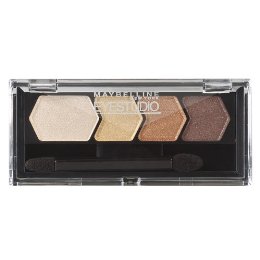
Your eyes are one of the most important features on your face…it’s one of the first features a person notices on you! So make sure to pay special attention to them, and bring them out more. Lately, I’ve been using Maybelline’s Eyestudio 4 color palette in Give Me Gold. It’s super cheap, it has good staying power, and the colors are actually very pigmented so you don’t have to run the brush over a hundred times. For a simple, refreshing summer look, I take a light hue, such as a sparkly cream or white and apply it all over my lid. Accentuate your brow bone by highlighting in. Just use the same light color and apply it on your brow bone 2-3 times, so that it really stands out. Use a light golden hue for the inner corners of your eyes and a copper, bronze color for your outer corners. Blend it in well. To make your eyes pop, use the light shadow you used earlier and apply it right in the inner corners of your eyes, making sure to get a tiny line on your lower lash. Finish off with a coat or two of mascara.
Step 5: Get a Pretty Pout
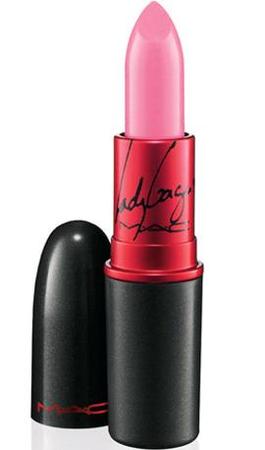
Since your eyes aren’t dramatic, you can play around with different lipstick hues. If you’ve been reading my posts, you know I’ve been obsessed with MAC Viva Glam lipstick in GaGa, which is a beautiful pinkish color that works great with this look. But, if you don’t have that exact lipstick, you can use almost anything. Just apply it to your lips and pat the color in to give it that just-kissed look. Finish off with a clear gloss and you’re good to go!
An Easy Summer Makeup Look